

- DaVinci Resolve Tutorial
How to Round Trip from Final Cut Pro to DaVinci Resolve

May 24,2019• Proven solutions
There are so many technical details involved in post product editing process but DaVinci Resolve (DVR) allows users to follow easy steps for processing. It supports all popular file formats and also assists in easy rendering of media files with other applications like Adobe Premiere Pro, Final Cut Pro X, Autodesk’s Smoke and Avid Media Composer etc.
This article will help you to learn about basic procedures to move files between different compatible platforms for executing easy editing process:
- Part 1: How to Transfer your project from FCP to DaVinci Resolve
- Part 2: How to MOve your Project from DVR to FCP
Recommendation: Start Video Editing with Easier Video Editor - FilmoraPro
Both Final Cut Pro and DaVinci Resolve are difficult to master for semi-pros. If you want to get familiar with these complicated video editing software, you can start with a simpler yet powerful enough video editor, like Wondershare FilmoraPro, which is available for both Mac and Windows operating systems. You can use it to sync audio to video and correct color automatically. You can also use it to make animation text to give your video a special effects. It is safe to download and low requirement of system. Download it now to have a try (free)!


Related: Best Alternatives to DaVinci Resolve
Part 1: How to transfer your project from FCP to DaVinci Resolve?
Step 1: Export your XML file with .fcpxml from Final Cut Pro
Once you have completed your editing process and now wish to move your sequence from FCP X then simply select the file, go to export XML option and then save the XML file with *.fcpxml extension.

You can always use the shortcuts of FCP to improve efficiency.
Step 2: Create New Project in DVR and Import FCP XML to DVR :
When you want to create a new project using DaVinci Resolve and want to import its XML file to same platform then follow these steps:
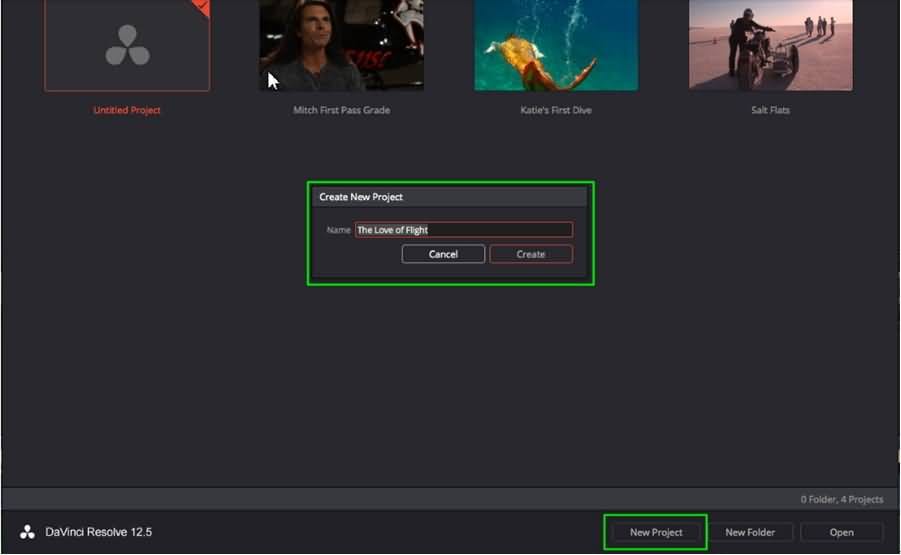
1. First of all you need to open DaVinci Resolve and go to project manager window. Hit the new project button and finally give a suitable name to your project. Hit create button.
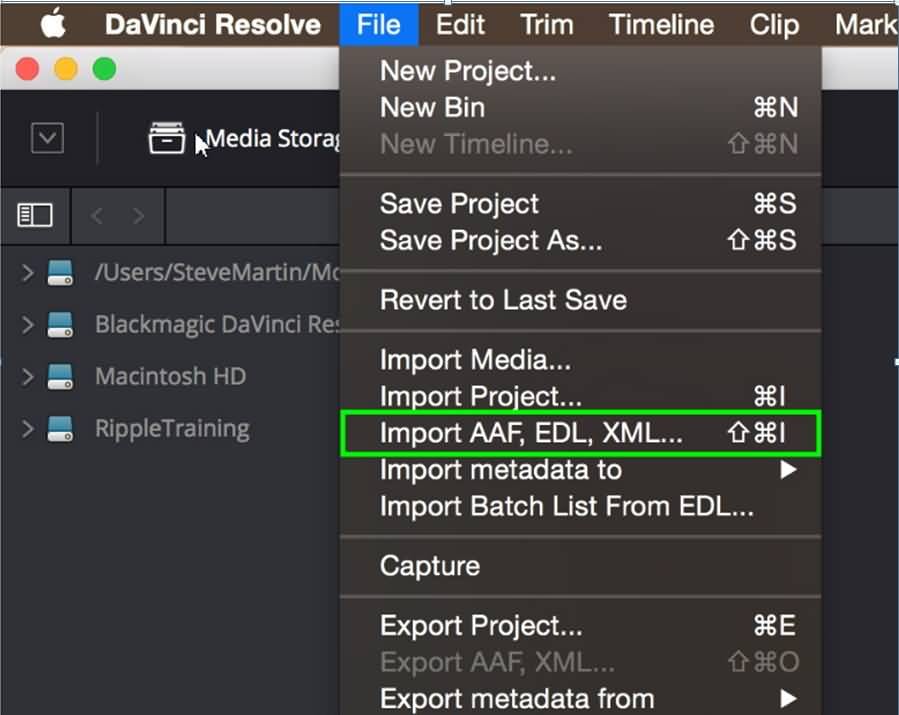
2. Now open your recently created project and double click over project tile; you can find it with orange border. Soon resolve will appear on screen with timeline and empty media pool. Go to file menu and then select Import AAF, XML or EDL.
Learn more details about How to import media files in DaVinci Resolve
3. It is time to navigate to the XML file that you have recently exported from FCP platform. Open it and soon a load XML window will be observed on screen. You can work upon basic settings as per need. If you access the automatic settings for project then it will ensure complete match between project settings of both platforms. Whenever you select your project on FCP X platform, all the master project settings will be automatically loaded to timeline when file gets imported.
Here is one more solution, use automatic import function to get clips on media pool. These clips will be imported on the basis of reel, clip name. timecode and many other useful details. In case if you want to access the primary grade settings from your FCP platform and wish to gain access to them on DVR then it is important to enable color information from settings.
You will be glad to know that Final Cut Pro (FCP) is only NLE that can end color information directly to Resolve platform.
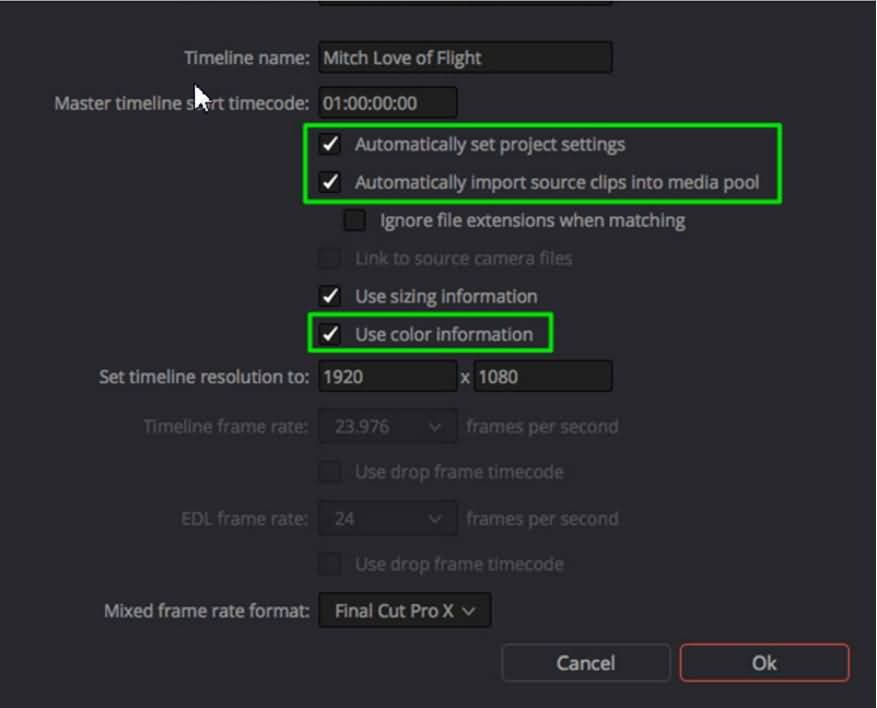
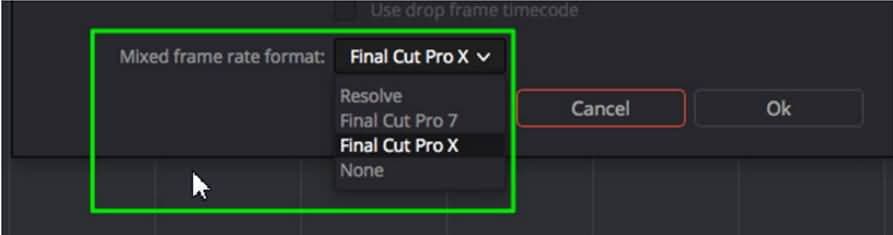
Note that if you are going to import an XML FCP X project and it contains clips with various mixed frames then you need to select FCP X from mixed frame rate format window. NLEs generally follow unique methods for calculation of clips that possess variable frame rates; this trick helps users to get most accurate results.
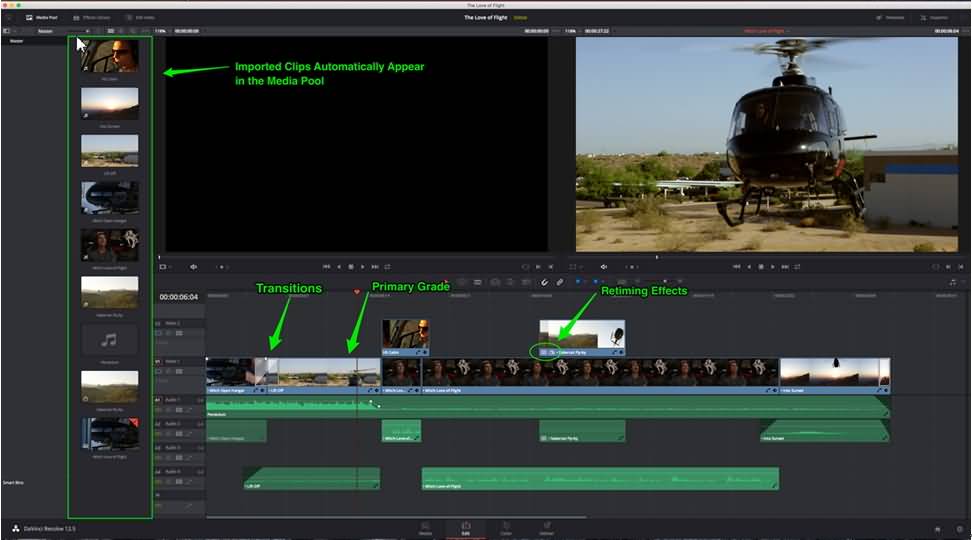
4. Finally, you need to hit Ok button and project will automatically populate with desired clips over media pool. This collection of clips will also appear at timeline and it creates perfect match with the edits that you have already performed in FCP.
Part 2: How to Move your Project from DVR to FCP?
Step 1: Export the XML out of DVR 12.5:
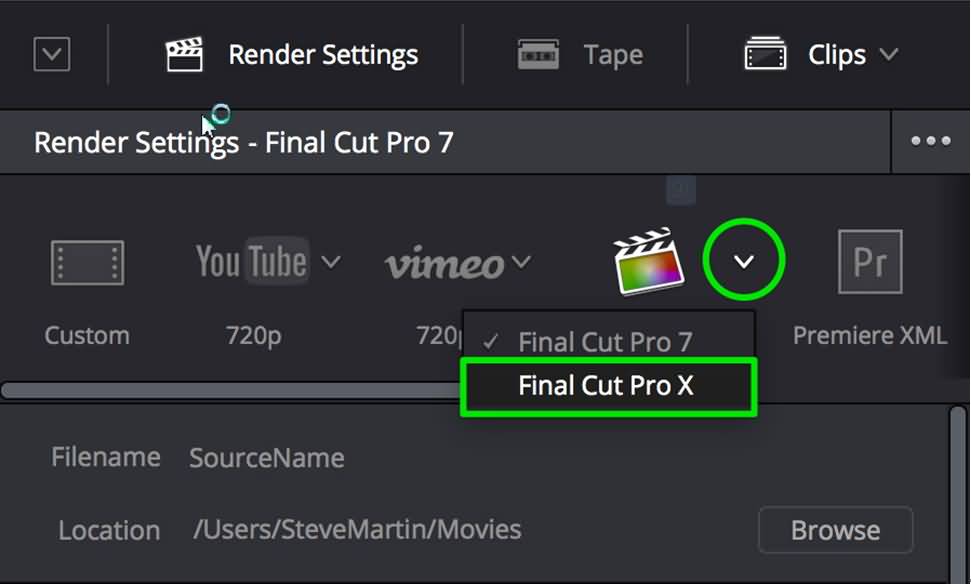
1. Suppose that you have already made all the desired changes to your clips using Resolve timeline. Now you want to send your project to FCP. Simply go to Deliver Page and then move to render settings panel. Here you will find so many presets on top portion of screen. In order to access the Final Cut Pro Preset, simply hit the arrow and choose FCP X from selections.
Learn more: How to Export in DaVinci Resolve
2. Your system will soon load all the supported video file formats, audio information and resolutions for selected Final Cut Pro X projects. Here you can select two things: type of codec for your timeline clips and the destination hard drive to render these files.
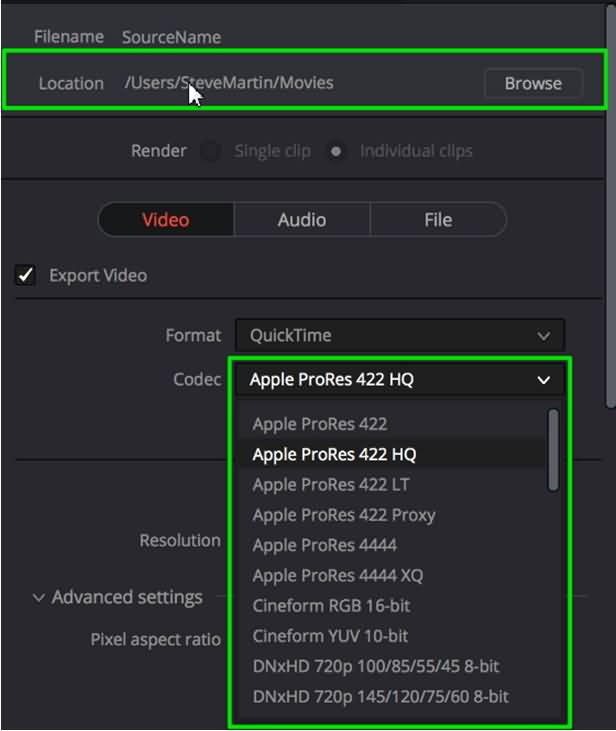
3. When you are ready to select your location for rendered media file then simply hit the browse button and start navigating towards location where you wish to store this rendered file. Hit Add new folder button and provide it a specific name. Hit Ok and again Ok to dismiss your file destination window.
4. If you want to add all clips into Render Queue then select entire timeline from the drop down menu on timeline and then use option for add to render queue.
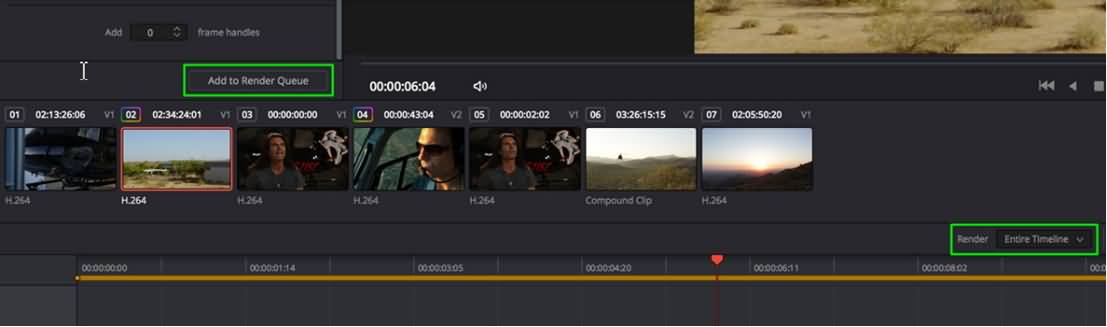
5. Finally, from render queue, choose Job and then click on start render option.
Step 2: Import XML back to FCP:
1. Go back to the FCP platform and select your library into which you wish to import your project from DVR. Now move to File Menu and then select import XML option.

Learn more: How to Import in DaVinci Resolve
2. It is time to navigate for the folder that you want to select for your currently rendered media, inside this folder a XML file will be developed from Resolve. Select this file and then hit import.
3. FCP will soon create new event in your targeted library; provide it suitable name. Now in the browser window, you will easily find your resolve project. Note that this process will not import any media file to browser. Now your editing task is completed and you can output the results.
Step 3: Access media after it has been re-imported to FCP:
In case if you want to access the rendered file in browser then simply park your playhead on any clip over timeline and then press Shift+F. Here is one important thing to know that this workflow serves in single direction. That means it allows users to send final cut pro X grades directly to Resolve platform so that further processing can be completed but it is not possible to manipulate grades that are sent from resolve to FCP. The process is quite simple to execute and you will be able to access your imported file in timeline with color grades.
That's it. You can also watch the video below to check our more details about moving FCPX project to DaVinci Resolve.


Want to know more information about the professional video editing software? Check our comparison review about DaVinci Resolve vs. Adobe Premiere.
Bring up your video to a professional level with straightforward tools.
Try It Free Try It Free
Liza Brown
chief Editor
0 Comment(s)